Building custom Docker images from cypress/included [shorts]
![Building custom Docker images from cypress/included [shorts]](https://digitalpress.fra1.cdn.digitaloceanspaces.com/omtmgjm/2022/04/test_copy.png)
In the past article, we saw how we can leverage upon cypress/included Docker images provided by Cypress to run Cypress tests inside a docker container.
In this article, we will explore how we can build a Docker image and push them to an image registry such as DockerHub.
I deliberately skipped building custom images and pushing them into the Docker registry part as it would have made it quite complex for a reader to understand.
Before we start I am assuming you have the following setup on your machine:
- Docker
- Cypress v9.2.0 Installed (as we will be using cypress/included:9.2.0 as our base image)
- clone the folder "Part 10" or complete the git repo Cypress-TestFramework
Getting started:
Start by creating a folder called "cypress-included" on your machine, which has a single Dockerfile:
- Dockerfile: which is just a cloned version of cypress/included/9.2.0/Dockerfile
the only change in our version of the docker file is instead of an ENTRYPOINT ["cypress", "run"] we have ENTRYPOINT set to ["npm", "run"] to leverage upon our custom-built script inside Cypress-TestFramework
# WARNING: this file was autogenerated by generate-included-image.js
# using
#   npm run add:included -- 9.2.0 cypress/browsers:node16.5.0-chrome94-ff93
#
# build this image with command
#   docker build -t cypress/included:9.2.0 .
#
FROM cypress/browsers:node16.5.0-chrome94-ff93

# Update the dependencies to get the latest and greatest (and safest!) packages.
RUN apt update && apt upgrade -y

# avoid too many progress messages
# https://github.com/cypress-io/cypress/issues/1243
ENV CI=1

# disable shared memory X11 affecting Cypress v4 and Chrome
# https://github.com/cypress-io/cypress-docker-images/issues/270
ENV QT_X11_NO_MITSHM=1
ENV _X11_NO_MITSHM=1
ENV _MITSHM=0

# should be root user
RUN echo "whoami: $(whoami)"
RUN npm config -g set user $(whoami)

# command "id" should print:
# uid=0(root) gid=0(root) groups=0(root)
# which means the current user is root
RUN id

# point Cypress at the /root/cache no matter what user account is used
# see https://on.cypress.io/caching
ENV CYPRESS_CACHE_FOLDER=/root/.cache/Cypress
RUN npm install -g "[email protected]"
RUN cypress verify

# Cypress cache and installed version
# should be in the root user's home folder
RUN cypress cache path
RUN cypress cache list
RUN cypress info
RUN cypress version

# give every user read access to the "/root" folder where the binary is cached
# we really only need to worry about the top folder, fortunately
RUN ls -la /root
RUN chmod 755 /root

# always grab the latest Yarn
# otherwise the base image might have old versions
# NPM does not need to be installed as it is already included with Node.
RUN npm i -g yarn@latest

# Show where Node loads required modules from
RUN node -p 'module.paths'

# should print Cypress version
# plus Electron and bundled Node versions
RUN cypress version
RUN echo  " node version:    $(node -v) \n" \
  "npm version:     $(npm -v) \n" \
  "yarn version:    $(yarn -v) \n" \
  "debian version:  $(cat /etc/debian_version) \n" \
  "user:            $(whoami) \n" \
  "chrome:          $(google-chrome --version || true) \n" \
  "firefox:         $(firefox --version || true) \n"

ENTRYPOINT ["npm", "run"]we are all set.
Building a Docker Image:
Now before we can start building an image first log into Docker using DockerHub credentials, if you don't have any just go to https://hub.docker.com/ and register:
Once you have the credentials just run the following command and you will pe prompted to add your username/password
$ docker login
Note: Username is something different than your email id used for registration on DockerHub.
Now we can just run the following command to start building our custom image:
$ docker build -t cypress-included-v9.2.0 .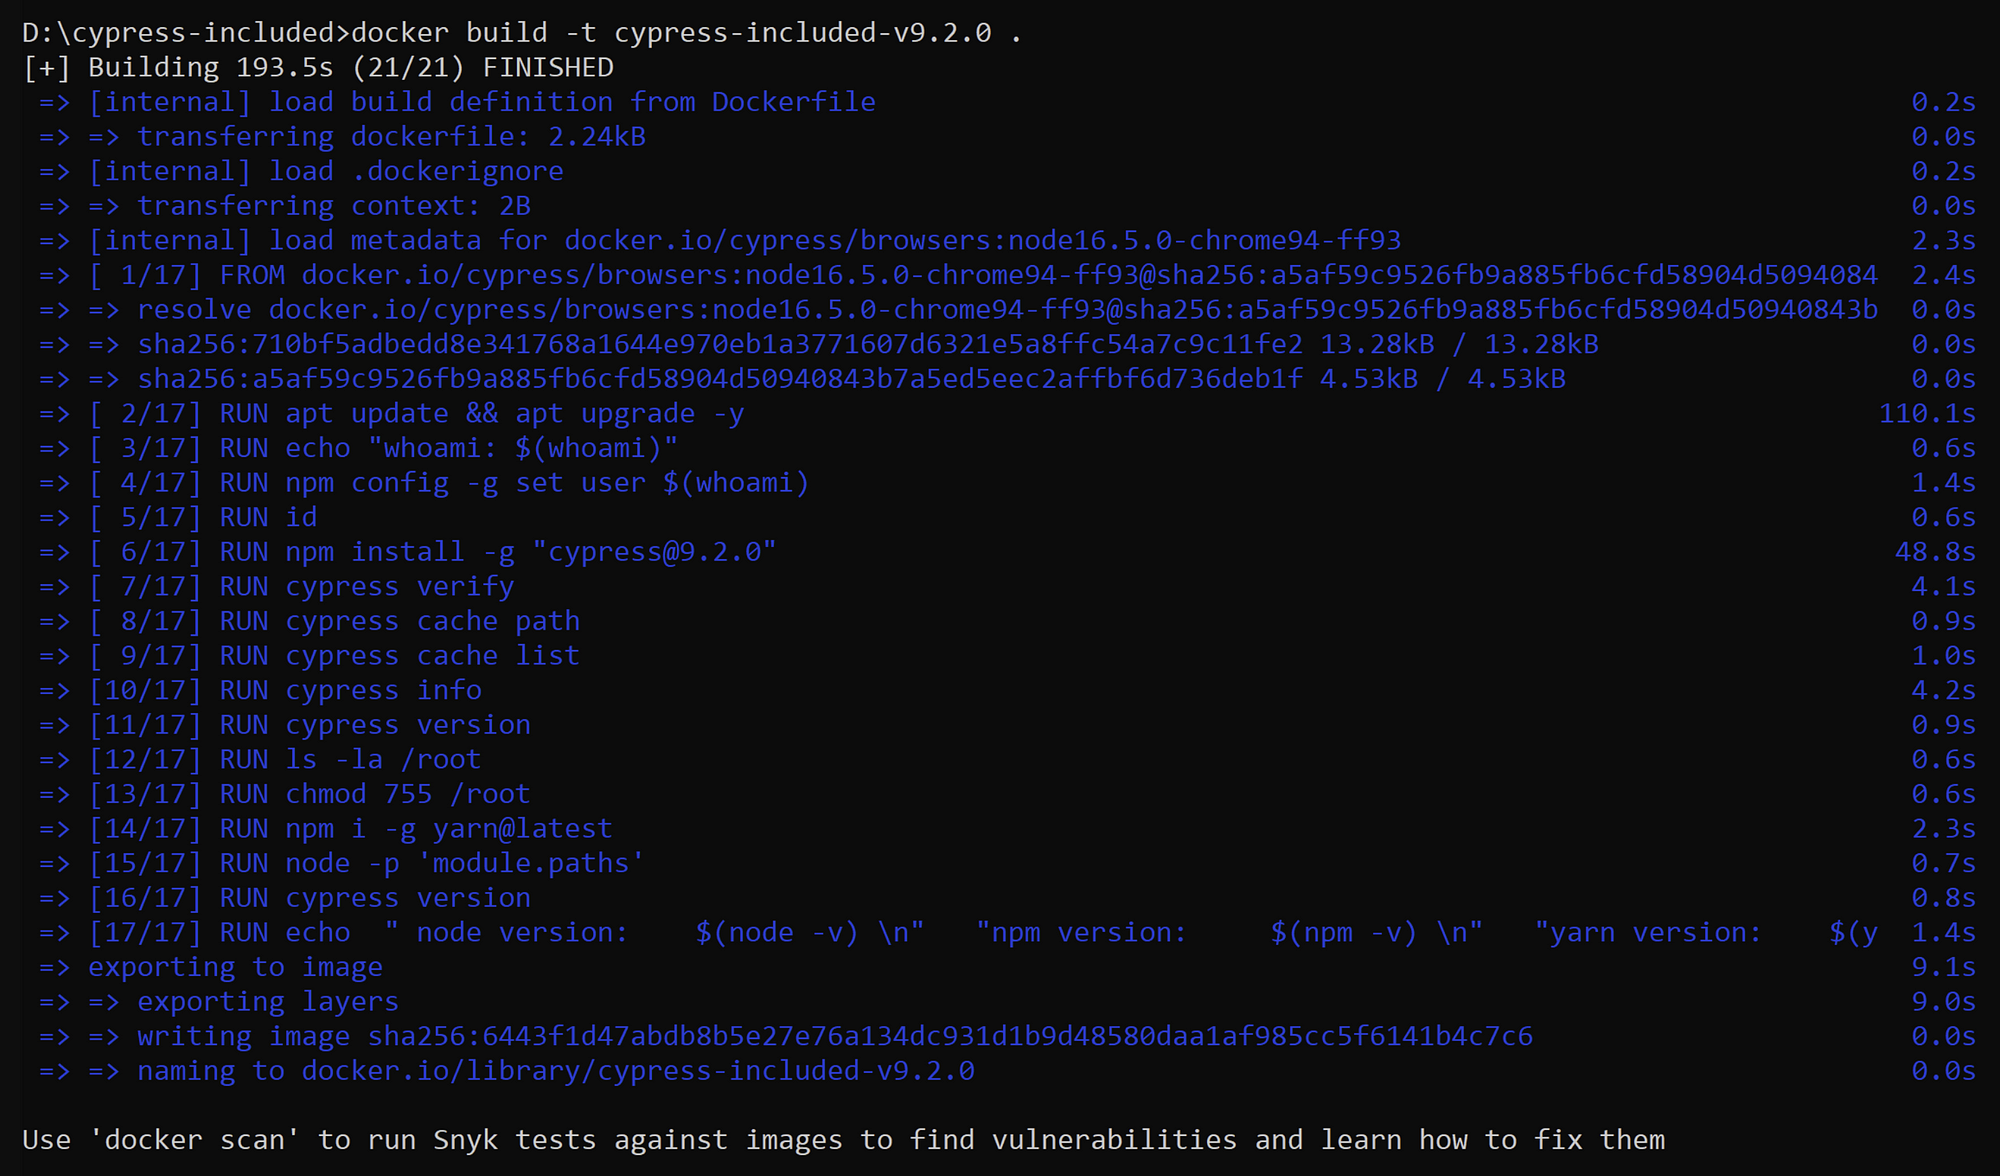
Verify the built image using the following command
$ docker images
Now tag the image for a version number:
$ docker image tag cypress-included-v9.2.0 {YOUR_USER_NAME}/cypress-included-v9.2.0:1.0.0upon running this command when you again run "docker image" you will see a new tag 1.0.0 created under your registry username

Pushing a Docker Image to a registry:
Now you can locally use the built image in the previous step, but if you want to share it with someone else or run it in a cloud setup you will need to push this image to a public registry such as DockerHub.
In case you are not logged in to docker log in using the following command:
$ docker loginand once logged in just run the following command:
$ docker push {YOUR_USER_NAME}/cypress-included-v9.2.0:1.0.0and you should see the image getting pushed to DockerHub

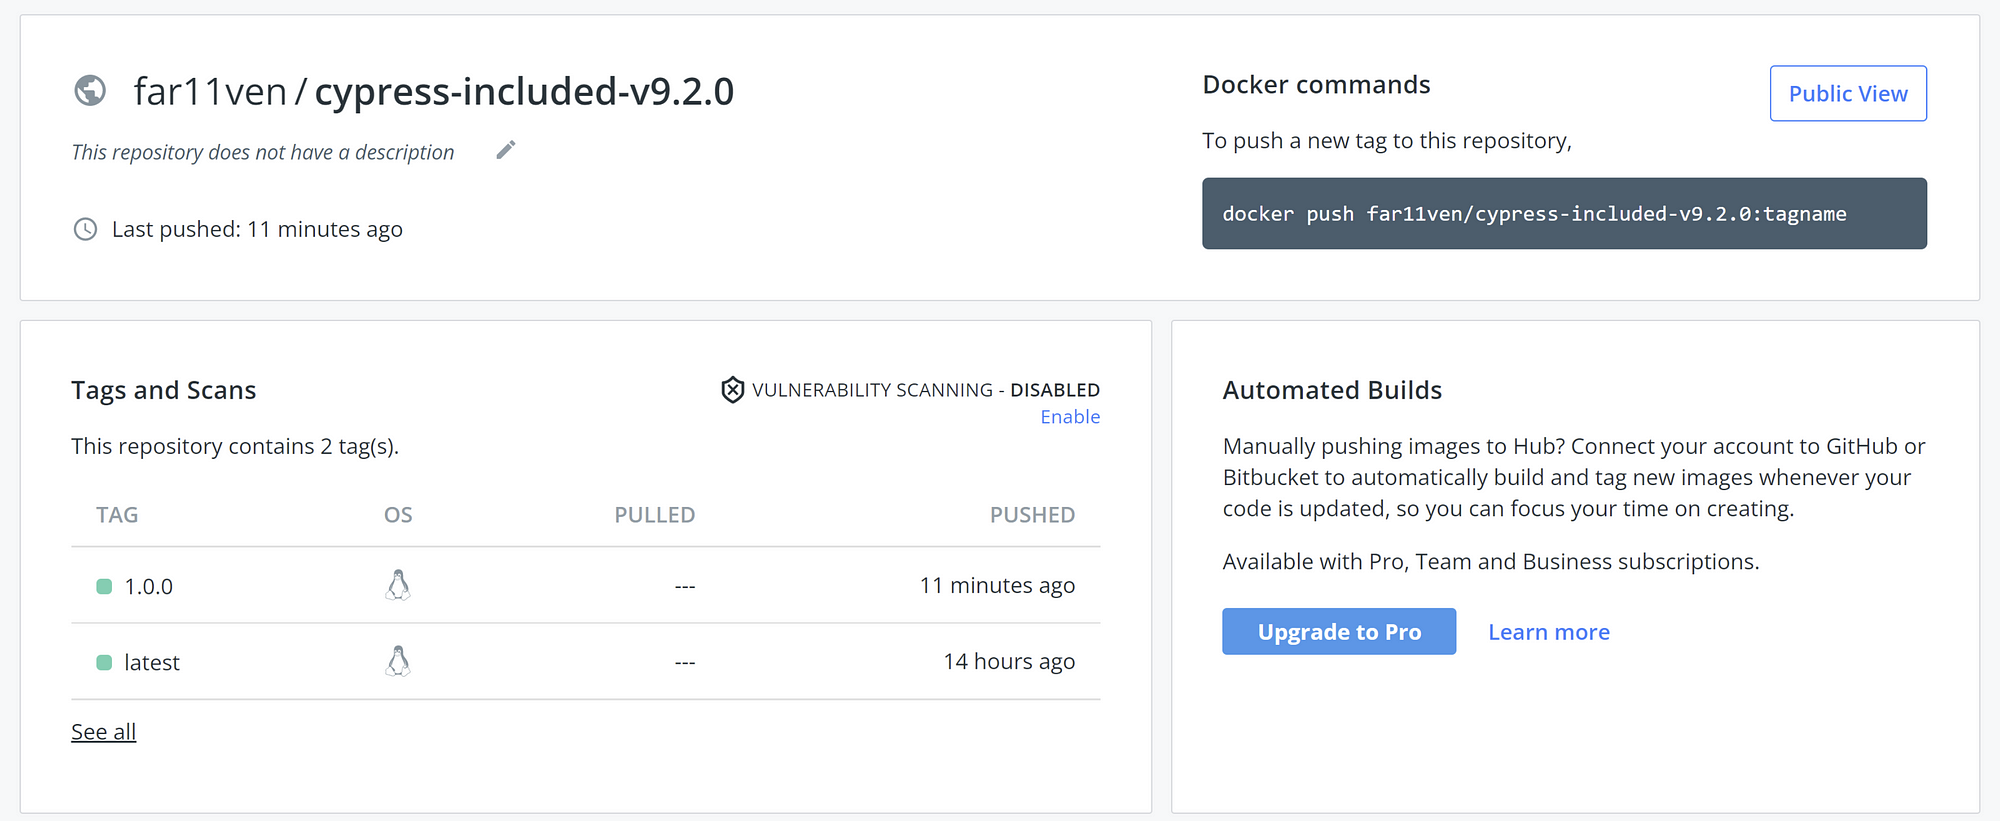
You can see the pushed images to DockerHub :
Now anyone can use this DockerHub image by first pulling it using:
$ docker pull far11ven/cypress-included-v9.2.0:1.0.0Verifying the custom-built image:
Let's start by examining the command provided by cypress-included for running this image:
$ docker run -it -v $PWD:/e2e -w /e2e cypress/included:9.2.0In our case, it will be modified a bit as
$ docker run -it -v $PWD:/e2e -w /e2e far11ven/cypress-included-v9.2.0so navigate to The Cypress Tests repository and in the terminal execute the above command:
Now this error is because docker couldn’t find the entry point “cypress run” as we had changed it in our Docker file to “npm run” to leverage upon the custom npm scripts
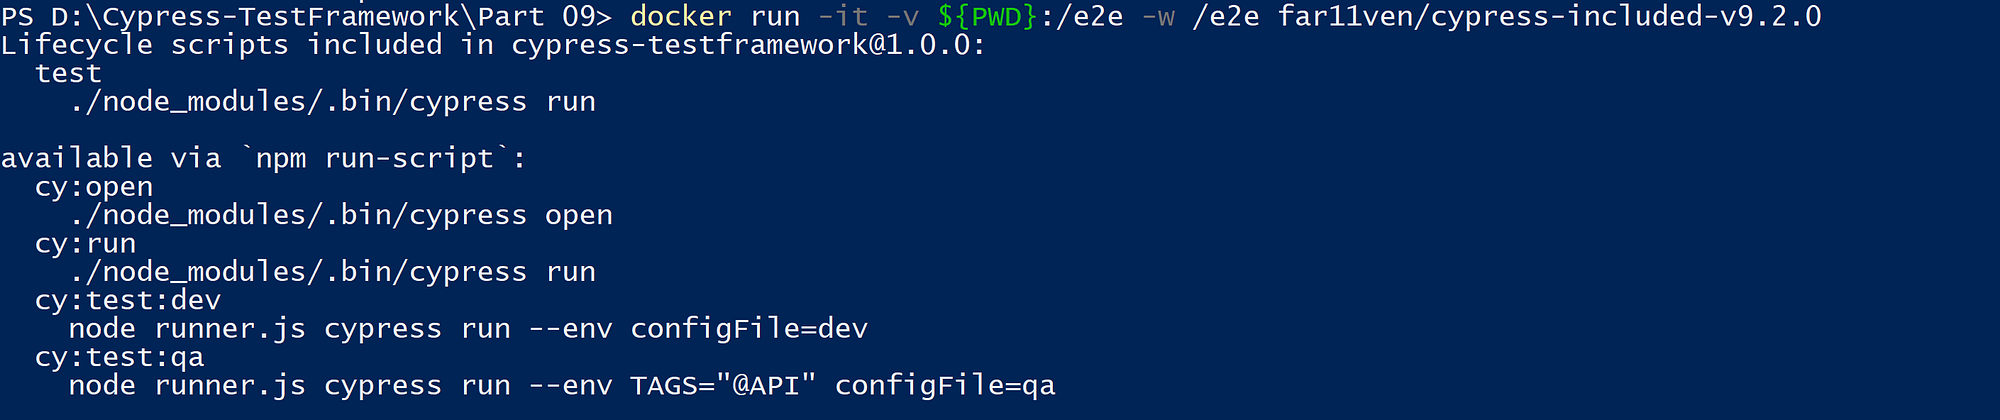
so the effective docker run command would be:
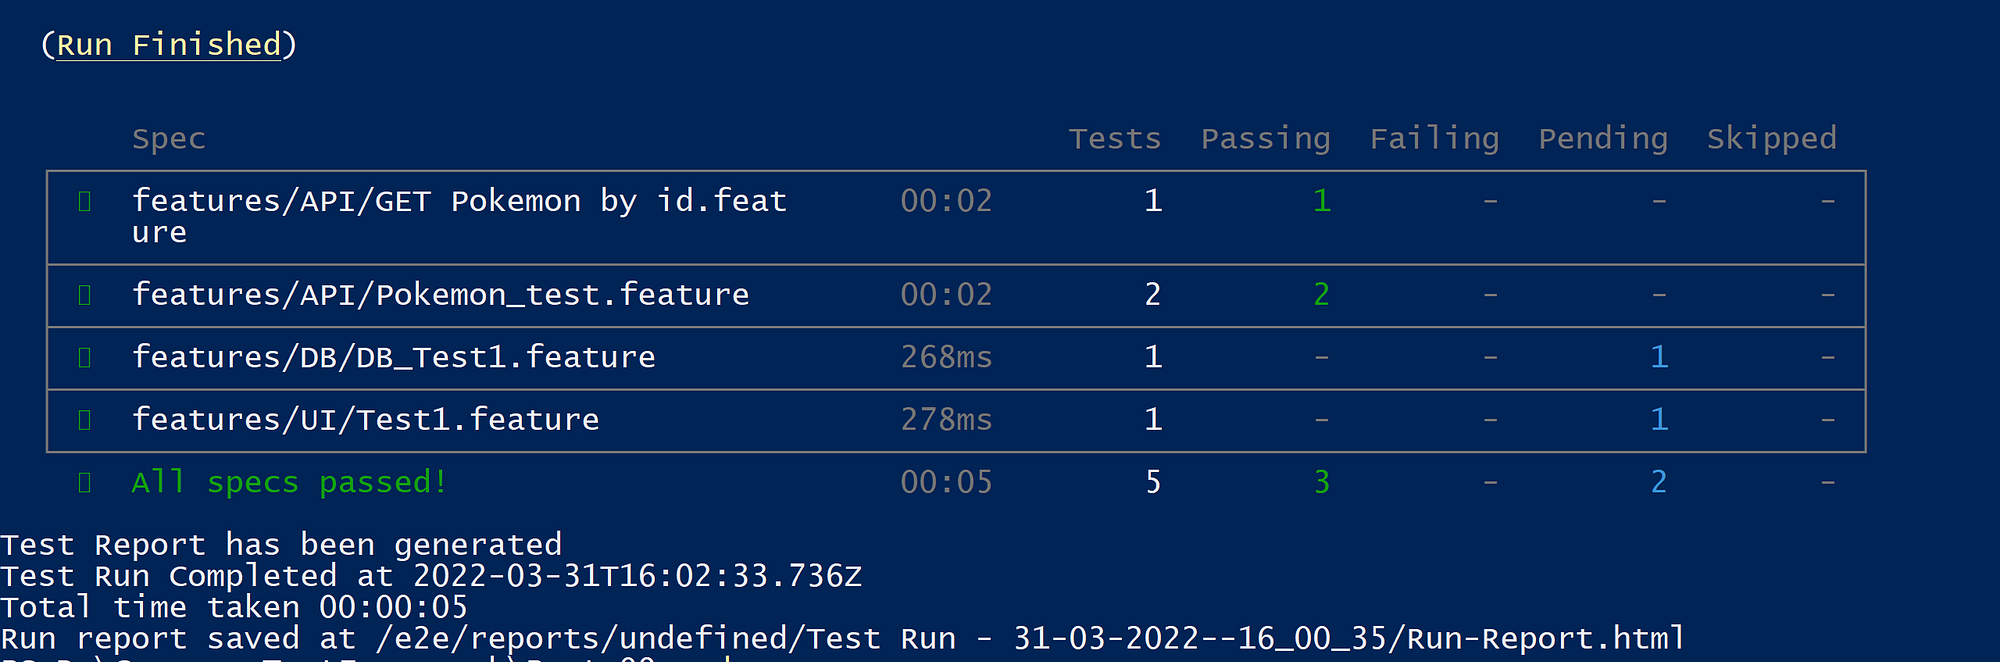
$ docker run -it -v $PWD:/e2e -w /e2e far11ven/cypress-included-v9.2.0 cy:test:qaupon running which we can see the tests start running

Run Result:
So that concludes how to build & push custom Cypress-Docker images and use them in our testing!!
Tschussi!!
Github Code:
https://github.com/far11ven/Cypress-TestFramework/tree/develop/Part%2010

![Sanitizing ArrayBuffer response [shorts]](https://digitalpress.fra1.cdn.digitaloceanspaces.com/omtmgjm/2024/07/Screenshot-2024-07-02-145822-3.png)
![Cypress GitHub Teams Notification [shorts]](https://digitalpress.fra1.cdn.digitaloceanspaces.com/omtmgjm/2023/09/44036562.png)
![ChatGPT x Cypress.io API tests [shorts]](https://digitalpress.fra1.cdn.digitaloceanspaces.com/omtmgjm/2023/02/cypress-chatgpt.png)